Armour
 At the end of 2013, I decided to get involved with the local garrison of the 501st legion,
a world-wide group who attend various events raising money for charity. But, to do so I would have to have a costume of some sort.
I decided that I wanted a classic Stormtrooper costume (from the original Star Wars film). I used the internet to track down
details of what was available. It turns out that the armour changed subtly between films 4,5 & 6, which led to various different builds.
A quick look on eBay showed a few sets of DIY armour being sold quite cheaply (it is at this point that the term 'cheaply' has to be
defined. Anything under £600 is 'cheap'). Using the excellent site run by the First Imperial Stormtrooper Division (FISD at http://www.whitearmor.net/forum/)
I found a long discussion on these sets. It turns out that they have been thrown together by someone looking to make a quick $, so they aren't
very good. I narrowed it down to 3 sellers of armour recommended by the users of FISD. After much scratching, I decided that
the best place to source one would be Cast from Originals (CfO), who sell armour that has been made from a cast from the original
armour used in the first (episode 4, to be exact), film. I contacted the sellers, and sat down when the price came through. No more
beer until 2015 !
At the end of 2013, I decided to get involved with the local garrison of the 501st legion,
a world-wide group who attend various events raising money for charity. But, to do so I would have to have a costume of some sort.
I decided that I wanted a classic Stormtrooper costume (from the original Star Wars film). I used the internet to track down
details of what was available. It turns out that the armour changed subtly between films 4,5 & 6, which led to various different builds.
A quick look on eBay showed a few sets of DIY armour being sold quite cheaply (it is at this point that the term 'cheaply' has to be
defined. Anything under £600 is 'cheap'). Using the excellent site run by the First Imperial Stormtrooper Division (FISD at http://www.whitearmor.net/forum/)
I found a long discussion on these sets. It turns out that they have been thrown together by someone looking to make a quick $, so they aren't
very good. I narrowed it down to 3 sellers of armour recommended by the users of FISD. After much scratching, I decided that
the best place to source one would be Cast from Originals (CfO), who sell armour that has been made from a cast from the original
armour used in the first (episode 4, to be exact), film. I contacted the sellers, and sat down when the price came through. No more
beer until 2015 !
What follows is the making of the iconic
Stormtrooper armour. However, I decided that I couldn't wait to start trooping,
so invested in a basic flight suit, then a few other bits, then a few more. So I
went from having the Stormtrooper armour to build, to having several other
suits. They are documented separately.
My attempt at a TIE Reserve Pilot is documented here :
 My upgrade to a full TIE pilot is documented here :
My attempt at a AT-AT driver is documented here :
 I'm going for an X-Wing Pilot here :
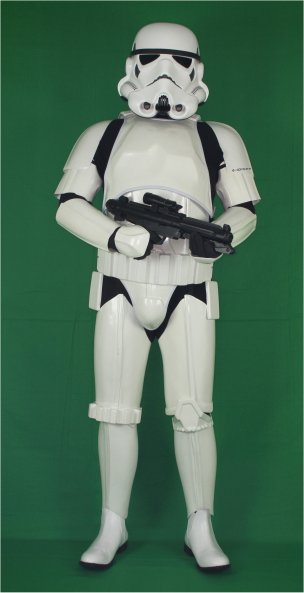
To explain the buying decision, the CfO armour was judged by FISD members to be accurate, is from a UK supplier, and
is relatively easy for a first-timer to put together. Especially important when you have
fingers like sausages. These pictures show the quality of the finished
product.

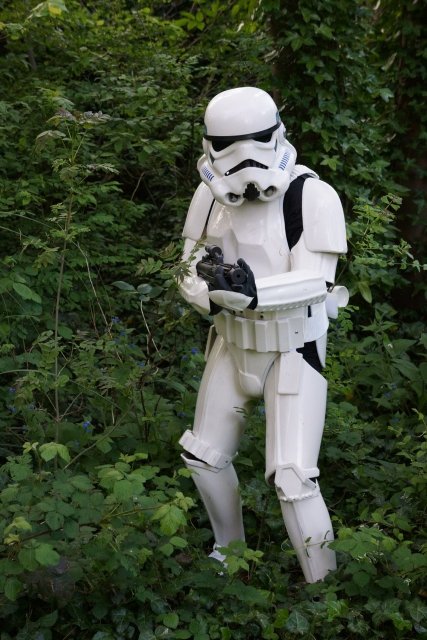

Nothing to beat there then !
2014 - Armour to be ordered
02/02/2014 -
Placed the order for my armour ! So excited. I've paid slightly more to have
bits like the fixings supplied as well. Save me buying them online and having to
find the correct bits. Also ordered a helmet liner, to make the fit better.
13/02/2014 - Picture updates from Mark at CfO arrive. Excitement levels hit an all-time
peak. Mark is supplying the helmet ready-made, as I thought that it is the
part that will have to look totally right to impress. I can make the
occasional upcock on the armour and probably get away with it, but not the
bucket. And, somewhere amongst the pile on the floor is the majority of my
suit, almost ready to be picked up. I can't wait !
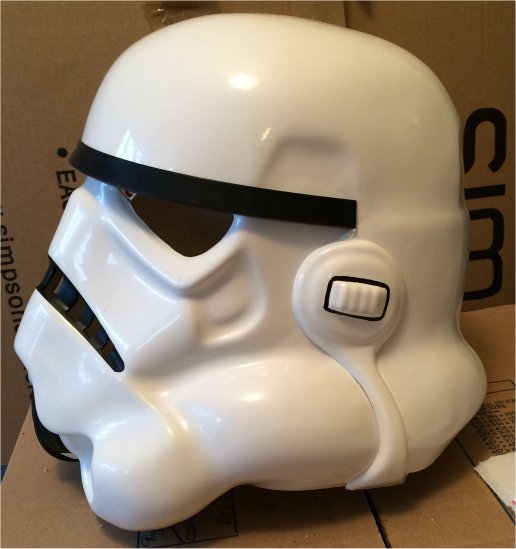

21/02/2014 - Email from Mark, the helmet is finished and he has formed all
of the armour. I can pick it up when I'm ready. Roadtrip !!
02/03/2014 - Going to pickup my new toy.
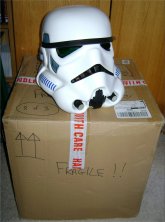
And I am now the proud owner of a Stormtrooper helmet and a cardboard
box. Now the fun really begins.
In order to assemble the kit, I have to buy such fun things as glue,
rivets, strapping, and velcro.
21/03/14 - I've finally decided to start. This is my work in progress blog
on the UK Garrison site at
http://www.ukgarrison.co.uk/forum/viewtopic.php?f=126&t=49847
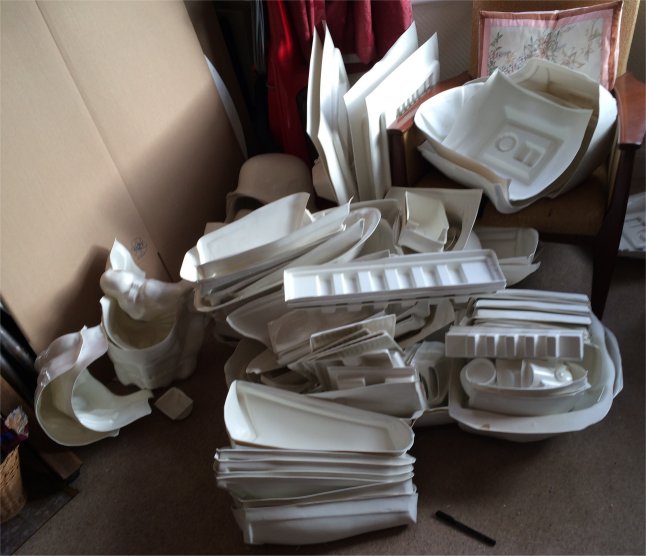
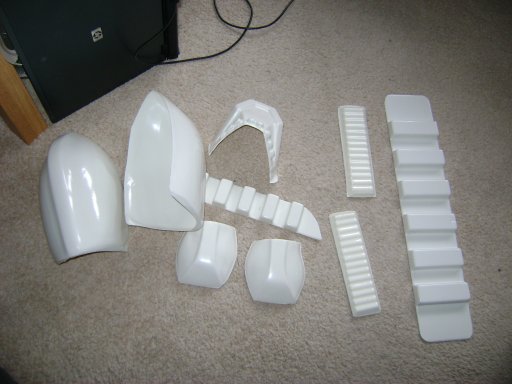
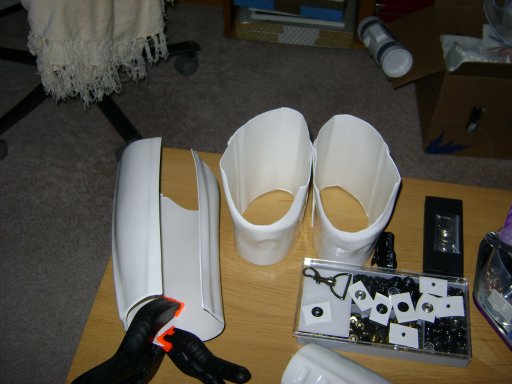
Well, I've finally opened the box from Mark at CfO and got all the bits out.
Then I sat down and caught my breath. I don't recognise half the bits, how
do they fit together ? I've checked various build threads on several forums
(forum, fora ?) and they help a bit. Unfortunately, most of them start with
'take your trimmed pieces and glue them like this', which is one stage
further on than I am at.
For some reason, call it overconfidence, call it rampant stupidity, I
decided to get the armour untrimmed, so I have loads of bits that resemble
an explosion in a plastic factory.
Where to start ?
Before we go any further, I must explain that my DIY skills rank down there
with my cat, I have yet to develop truly opposable thumbs, so giving me a
craft knife is just insane.
So, I did a few test cuts on areas that seemed like they wouldn't make a
difference. And no-one died !
Buoyed with the confidence that can only be displayed by a certified idiot
such as myself, I decided to plough straight into the big bits. I'm
following Centurion's build on whitearmour as a guide, as Mark is
working on documenting the assembly at the same time as I'm trying to
assemble things, luckily Centurion is
using a CfO suit build, so I'm hoping that I can just mirror what he is
doing.
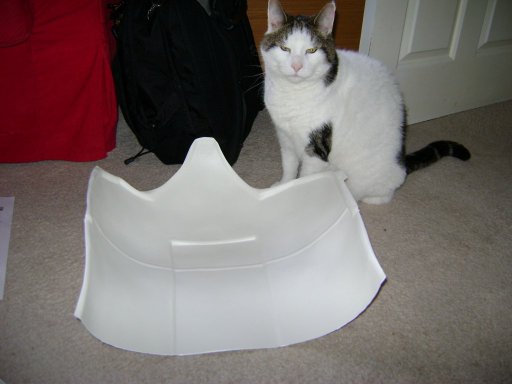
30 minutes later, and my helper surveys the carnage.

06/04/14 - After a little break to confer with Mark and ask some pertinent
questions (like, why did I decide to do this) I turned my hands back to the
armour. The poppers turned up during the week, and I was dying to try
them out. Fluffed a few before I got the hang of it.
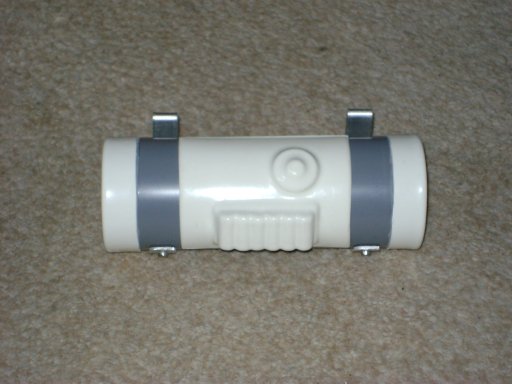
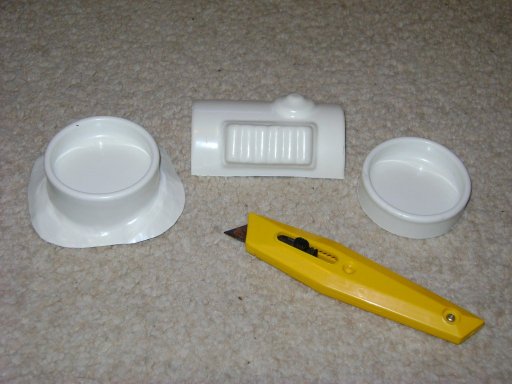
Before attempting anything else, I assembled the thermal detonator
(TD). I bought myself a cheap dremel-like drill, which has loads of
attachments, drill bits and sanding tools. I used the sander on the pipe to
allow the end caps to slide on. The TD goes on the back, clipped to the
belt. I decided against gluing both end caps on, as I might want to put
something in there, or use it for storage. So I glued one end, after
attaching the belt clips.
I also trimmed down a few more bits, cutting them more to final shape as I
worked through Mark's instructions. Unfortunately, the Centurion
instructions leave a lot out, so I switched to Mark's one. I've progressed
to where he has written, and a bit beyond, so I'm working from various
different assembly instructions, trying to find the one that does what I
want. No two sets of armour manufacturers put theirs together in the same
way.

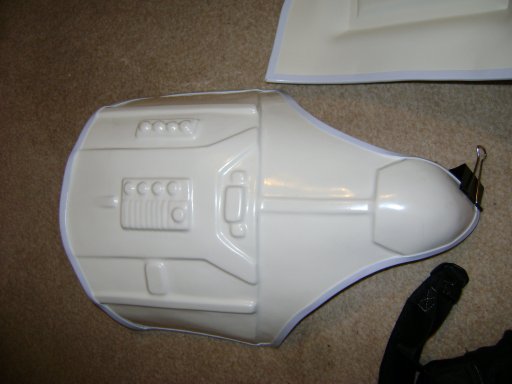
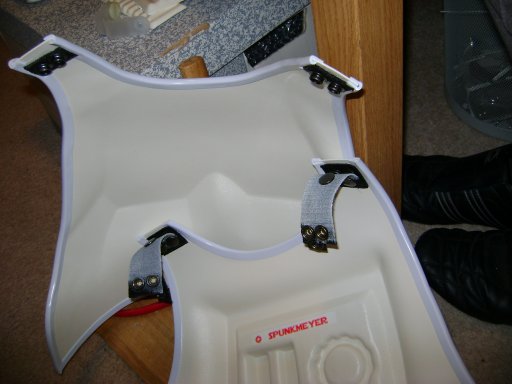
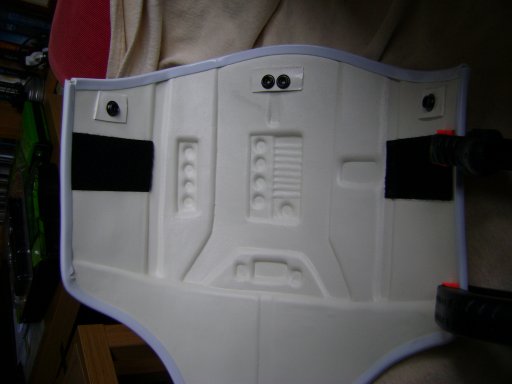
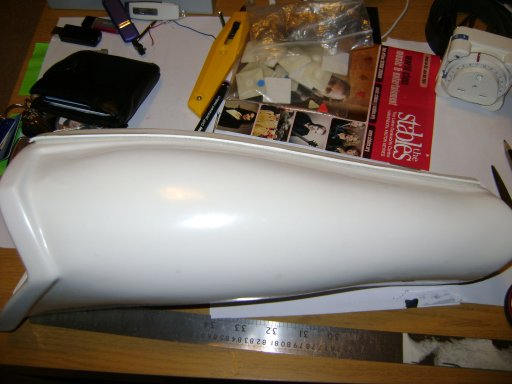
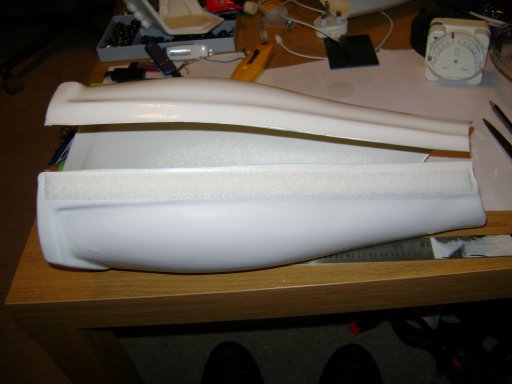
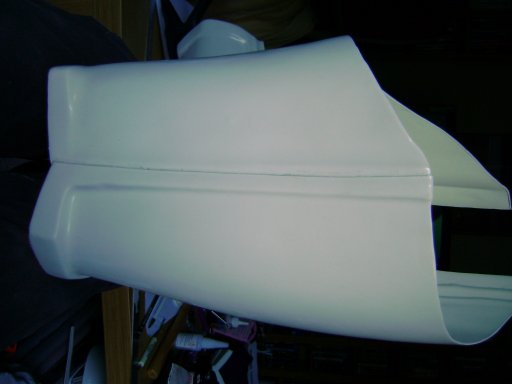
Not only have I trimmed the back plate to the final shape, I've added the
edging strips, gluing my fingers together constantly. I invested in a set of
B&Q budget clamps, which hold the bits together a lot better than I could.
£8 well spent.
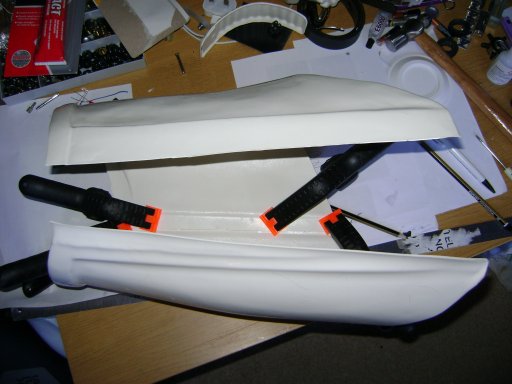
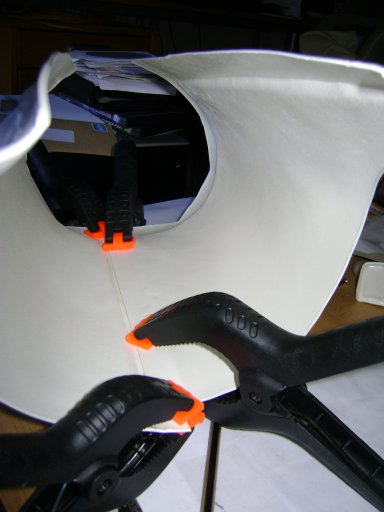
Using the poppers and some straps from old laptop bags I have placed a few
of the connecting mounts on the back plate. These will have the shoulder
straps connected to them.
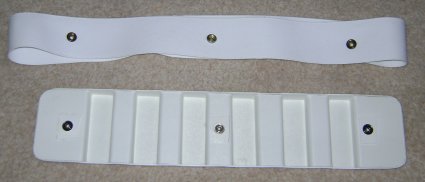
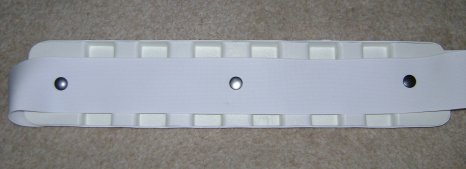
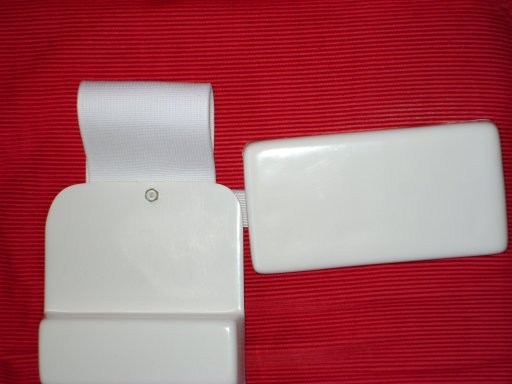
I've also been spending some time on the belt. I've attached the poppers to
the elastic belt so that I can attach the two together, I've also cut the
drop boxes to shape, attached a strap and popped them to the belt. Coming
along nicely, and my confidence is growing the more I do.
17/04/14 - Well, after a gap to do things like work, I have done a few more
bits.
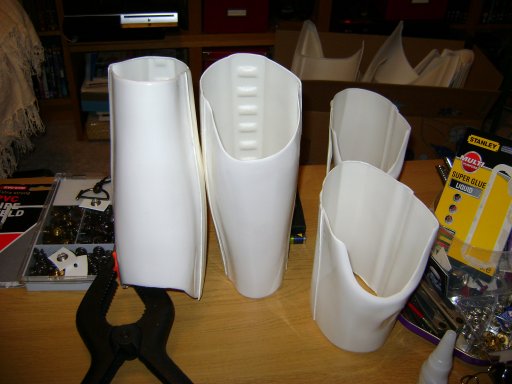
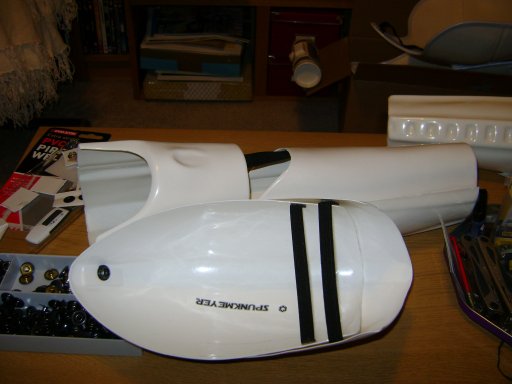
I thought that I'd start on the arms, so I glued the bicep pieces
together. The guide suggests gluing the front and using velcro on the back, but
they seem big enough to get my arm through, so I glued both sides.
The next step was to begin on the forearm pieces. This is where the clamps came
into their own, I might have to buy another set as I can only do one side at a
time.
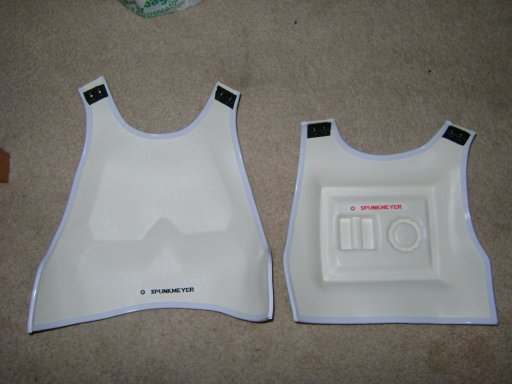
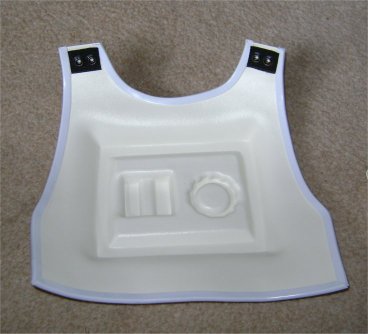
Whilst waiting for the glue to dry (24 hours), I finished trimming the chest
plate and put on a couple of name tags, just in case I ever have to change with
other troopers. Although, I do think that I will be able to tell my build from
others. Mainly from the wavy lines of the cuts. Even along a steel rule, I can't
cut straight. Perhaps I have a bent knife ?
24/04/14 - Easter is a time for family and friends,
for relaxation and celebrating Christ.
Not in my house it wasn't. Easter is a long weekend of my trying to sneak off
and make with the glue. I'm sure the kids think I have a habit.
Although, the trip to West London to visit relatives did allow me to make a side
trip to Mark at CfO, as we discovered that I was having trouble with the thighs
as I had the wrong bits. Mark gave me the right bit, a few bits of advice about
things that I was worried about, and a bit of moral boosting. Great bloke, and
if I ever decide to make another suit I know where I will be shopping,
especially as he's got a 'new' one to cast.
Back home, I hid myself away and checked on my
biceps and forearms that I had glued before we left. Success, I could actually
put them on my arms.
I also added the trim to the ab plate.
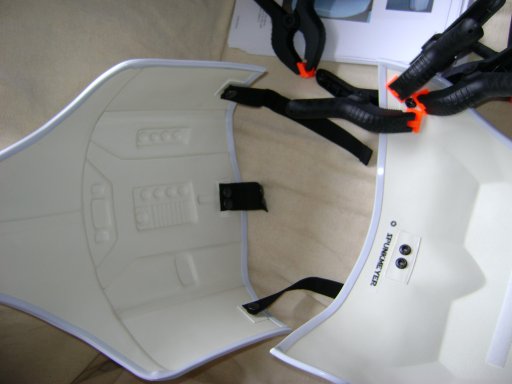
Now, how about adding some straps between the chest
plate and the ab plate. I went for straps rather than velcro for security, I can
always make some longer straps if required, and I will carry some spares when I
troop.

Once dried, I connected them up to see if my
placement was correct-ish.
I had made some straps with double poppers for the
shoulders, so these went on after a bit of left over shoe dye was applied.
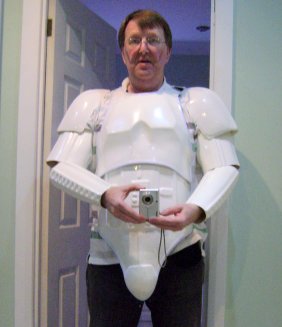
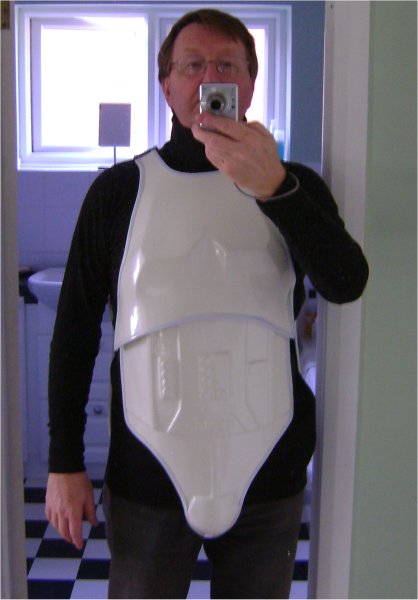
Finally, because I am fairly impatient, I decided to try it on to see the fit. I
didn't want to parade round the house in the undersuit, as the family deserve to
keep their food down. The shoulder bells attach to a popper mid-way down the
shoulder strap, I haven't added the connection to the bicep as yet.
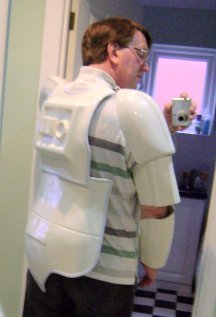
Just for the Boss at the 99th, this is the best butt
view I could do. (It's too complicated to explain, just go with me on this one
please.)
The strap lengths might need a rethink.
I've made the strap to join the ab plate to the butt plate between my legs, and
will have to experiment with dressing myself. Just the shoulder straps to bend &
fit, then the top will be complete apart from sanding the joins and a general
smoothing where I've been a bit clumsy. I'm well pleased with my progress, and
can't wait to start on the legs. The bad thing about Easter is the catching up
with all the work from the holiday period, so I might not get anything done
before the weekend, and I'm helping out with the MK Garrison at the Corsham
family fun day on Saturday, so free time will be limited.
09/06/14 - Is it really a couple of months since I last did anything ?
Work/home/life got in the way. And a few troops as a TIE pilot. That said, I
have actually been doing the occasional bit of sticking & cutting. I managed to
trim and glue the shins once I changed the strap lengths on the shoulders. not
looking too bad, but I'm a bit of a klutz with the glue, and will need to sand &
polish before appearing in public.

First, a pair of straps to bind the sides together - Poppers onto the back plate
and velcro onto the front. Extremely uncomfortable at first fitting, that will
change I assume.
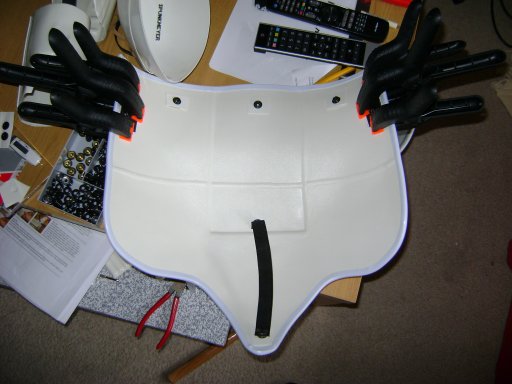
The overall effect is to pull the armour in tighter
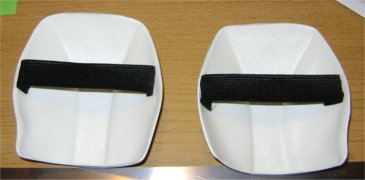
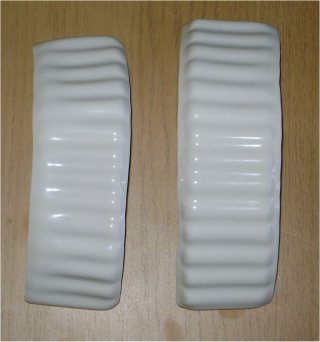
Also added elastic to the shoulder bells to hold them straight, to the hand
guards, and attached the ammo pouches to the belt.
The less said about my attempt to bend the shoulder straps the better.
Work on the shins didn't go too badly, once I decided which bits went together.
Glue along the front, then velcro along the back to allow them to part for
fitting.
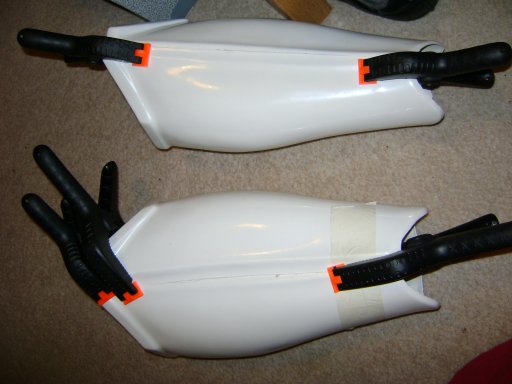
Now for the most difficult bit so far. The thighs confused the hell out of me. I
couldn't work out how they went together. After quite a lot of searching round
the net, I realised that the two legs are not supposed to be the same ! The
right thigh is higher than the left, so I can start trimming and fitting them
together.
Loads of E6000 and clamps, then left for 24hours to make sure that they hold.
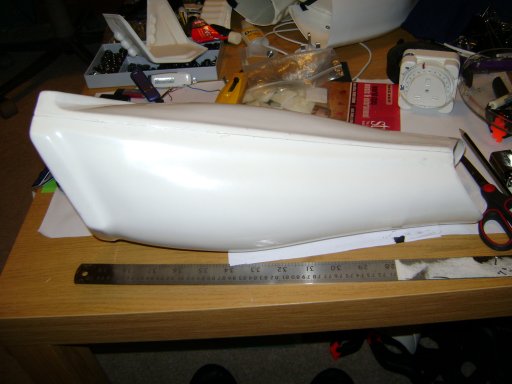
Next step is to slip them on and use some tape to check the fit before cutting
the last bits off, then making the suspender belt to take their weight during
use. Frilly or plain ?
 02/10/14 - After a long wait, mainly caused by trooping and concentrating on the
TIE pilot armour, I returned to the Stormie. First thing, get the ab plate
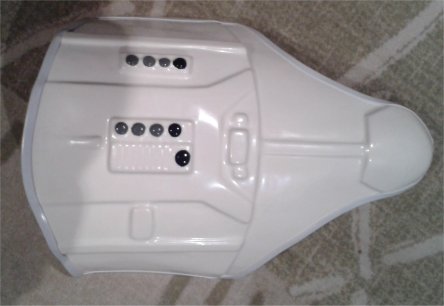
buttons painted.
There are set colours for the buttons, the bottom 3 buttons are Humbrol blue 15,
and the rest are Humbrol grey 5. Luckily, I happen to have
those exact colour in the remnant of my train layout days.
Once again, my legendary DIY skills came to the fore, as I got more paint on me
than the buttons. The picture left just doesn't do the mess I've made justice.
Once I've given it another coat I will have to tidy up by making the button
rounder. Such fun.
02/10/14 - After a long wait, mainly caused by trooping and concentrating on the
TIE pilot armour, I returned to the Stormie. First thing, get the ab plate
buttons painted.
There are set colours for the buttons, the bottom 3 buttons are Humbrol blue 15,
and the rest are Humbrol grey 5. Luckily, I happen to have
those exact colour in the remnant of my train layout days.
Once again, my legendary DIY skills came to the fore, as I got more paint on me
than the buttons. The picture left just doesn't do the mess I've made justice.
Once I've given it another coat I will have to tidy up by making the button
rounder. Such fun.
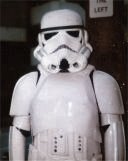
Trying the suit on for the first time.
Surprisingly, the helmet didn't seem as claustrophobic as I thought that it
would, although I do appreciate that extra room in the TIE-type helmets. airflow
for one thing, and the fact that I cannot get the helmet on whilst wearing
glasses. So, I will be the blind stormtrooper. well, blinder than the others,
anyway.
Next comes the dreaded clearance, I send pictures into the MKG, 99th and UKG.
Let's see what they decide that I've got to change.