tie reserve pilot

I wanted to try to recreate this (picture taken from the
501st CRL) as a first attempt. Although, as I tend to look like a bag of spuds
in whatever I wear, this could be stretching things. Quite a lot, bearing in
mind my girth.
With cries of "to the internet" I stepped boldly
across genres and onto
various sites to research possible places to buy and ideas of what was out
there. eBay is generally disregarded as a purchasing site as a lot of the
substandard equipment is sold on there. Things like helmets that are not of the
correct size, shape or detailing to get approval, but are sold as such. When you
are paying a lot of money out, you want to keep mistakes to a minimum. That
said, there are a lot of items out there that pass muster. First, I found a
seller on eBay who had listed quite a few Star Wars outfits. I checked the
pictures supplied against the reference material, and they seemed OK. I also
checked the forums on the various sites like the 501st Legion site to see what
experience other had with buying from the internet. There were a few
places/sellers that were regarded as no-go's for a variety of reasons,
especially overpricing and not of the correct standard. I then made my first
purchase.
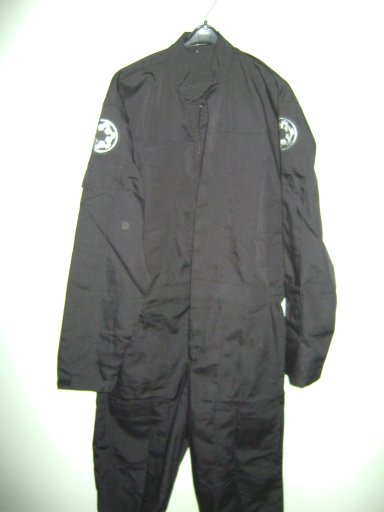
A flight suit. All the way from Singapore, but free
delivery (always a plus. I know, they probably add it on to the cost of the
item but, still).
I compared the supplied picture against the one from the CRL,
and it seemed to match, especially the pocket configuration and the patches on
the shoulders.
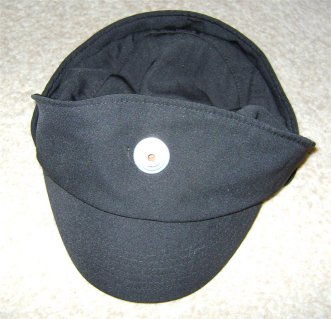
Checking further, they also do a cap. On the basis that it is probably best to
get it from the same manufacturer to get the same material, I added this to the
order.
So I ordered both items, and sat back
awaiting delivery. Well, not exactly. I then went in search of other bits, like
a pair of boots and gloves.

The boots have to be black calf-length without any
straps or decoration. I found these on a site selling safety footwear.
should be great to protect against the odd Stormtrooper standing on my foot !
The gloves took a bit more
searching, they have to be more gauntlets than gloves. These were from a site
selling motorcycle clothing.
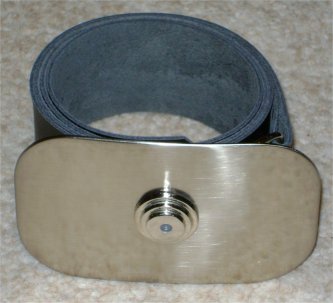 The
belt was a mission. It has to be black leather, 2" wide with an oblong buckle
with rounded edges. Not something off-the-shelf, as I found. I thought that I
would try buying the belt and making the buckle myself (I like a laugh.
Sometimes, it's as if I have no memory of my DIY skills) so I plodded off around
the shops. Unfortunately, the current trend is for skinny belts for men, and I
quickly got fed up with the funny looks from the assistants in the ladies'
shops. Ho-hum, back to the internet. I found the belt from the same supplier in
Singapore, but I'm not sure that the buckle is correct, so I might replace it.
And I have to put a rivet next to the buckle.
The
belt was a mission. It has to be black leather, 2" wide with an oblong buckle
with rounded edges. Not something off-the-shelf, as I found. I thought that I
would try buying the belt and making the buckle myself (I like a laugh.
Sometimes, it's as if I have no memory of my DIY skills) so I plodded off around
the shops. Unfortunately, the current trend is for skinny belts for men, and I
quickly got fed up with the funny looks from the assistants in the ladies'
shops. Ho-hum, back to the internet. I found the belt from the same supplier in
Singapore, but I'm not sure that the buckle is correct, so I might replace it.
And I have to put a rivet next to the buckle.
If you've been paying attention, you'll remember that the CRL is fairly precise
in it's requirements. On the cap and the belt, there is a rounded decoration
called the Imperial Code Disk. To conform to spec it has to be
"A stepped
cone shape appearing to be 3 disks stacked on top of one another. There is an
indentation in the center of the top disk"
(from the CRL). The ones
supplied on the belt and cap didn't look right, especially as they were missing
the indentation. What ho, I thought, I can have a go at making these, they'll be
easy.
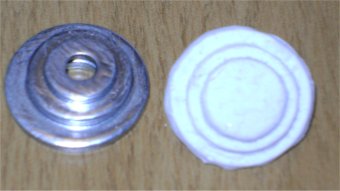 Here's my first two goes !
I thought that I could take a cast of the one supplied, then form it in plaster
of paris and sculpt the hole in it. Probably due to my aforementioned DIY skills
the rings weren't concentric, and the casting was rough (right in picture).
Painting it up made no difference and it was consigned to the bin. A brainwave
had me in the garage searching through the accumulated rubbish for metal
washers. Luckily, the gene from my father that makes me never throw anything
away supplied washers of the correct size. Normally, me+superglue=hospital, but
I managed to make two sets without any crying. Once dry, I found all my old
modeling paints and slapped a coat of silver on one set. As can be seen from
the picture above, it didn't work out very well. The second try was better
because I sanded them first, and used a different pot of paint. With the
addition of a pin on the back (more superglue fun) it actually looked correct !
No-one is more surprised than I.
Here's my first two goes !
I thought that I could take a cast of the one supplied, then form it in plaster
of paris and sculpt the hole in it. Probably due to my aforementioned DIY skills
the rings weren't concentric, and the casting was rough (right in picture).
Painting it up made no difference and it was consigned to the bin. A brainwave
had me in the garage searching through the accumulated rubbish for metal
washers. Luckily, the gene from my father that makes me never throw anything
away supplied washers of the correct size. Normally, me+superglue=hospital, but
I managed to make two sets without any crying. Once dry, I found all my old
modeling paints and slapped a coat of silver on one set. As can be seen from
the picture above, it didn't work out very well. The second try was better
because I sanded them first, and used a different pot of paint. With the
addition of a pin on the back (more superglue fun) it actually looked correct !
No-one is more surprised than I.

An optional extra to the outfit is a comm pad (left), which fits into a
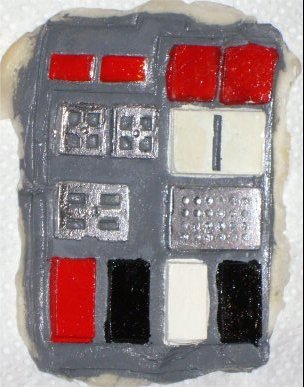
pocket
on the sleeve. How difficult can it be to make one of these, I thought. No
superglue involved, just squares with paint on, even I should be able to do
that. Try #1 again involved plaster of paris, and again ended in the bin. Try #2
was more successful, and I decided that it was useable. One problem with plaster is that it would be rigid, so I made a mould of the finished article,
and then used latex to make a flexible pad that would fold around the wrist.
Painted up, it doesn't look too bad (IMHO) (right). Now I just need something to
glue it that will make it slightly more rigid.
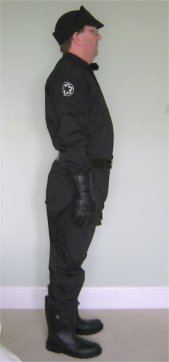
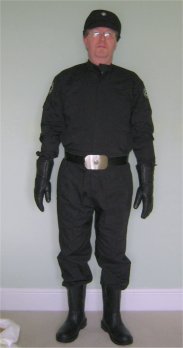
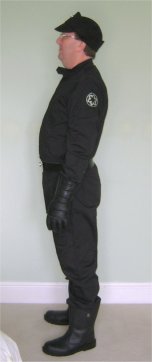
And this is what it looks like on :
And on 14/02/2014 I get this via facebook -

I'm cleared for trooping. Let the fun begin.

05/04/14 - As if to demonstrate the different requirements of the various groups
'out there', I submitted the above costume to the 99th Garrison, so that I could
attend some of their events. And it failed to gain approval ! To pass, I will
have to change the boots & gloves, send in better pictures to prove that the
suit has the correct number of pockets, and add the comm pad. As I've now
ordered a helmet, armour and chest box from the internet I shall wait until they
arrive and resubmit to both groups to see if the new arrangement gets passed.
But I can attend events organised by the MKG without any changes.
 History
 Armour
 Home
Home
 Trooping
 Contact